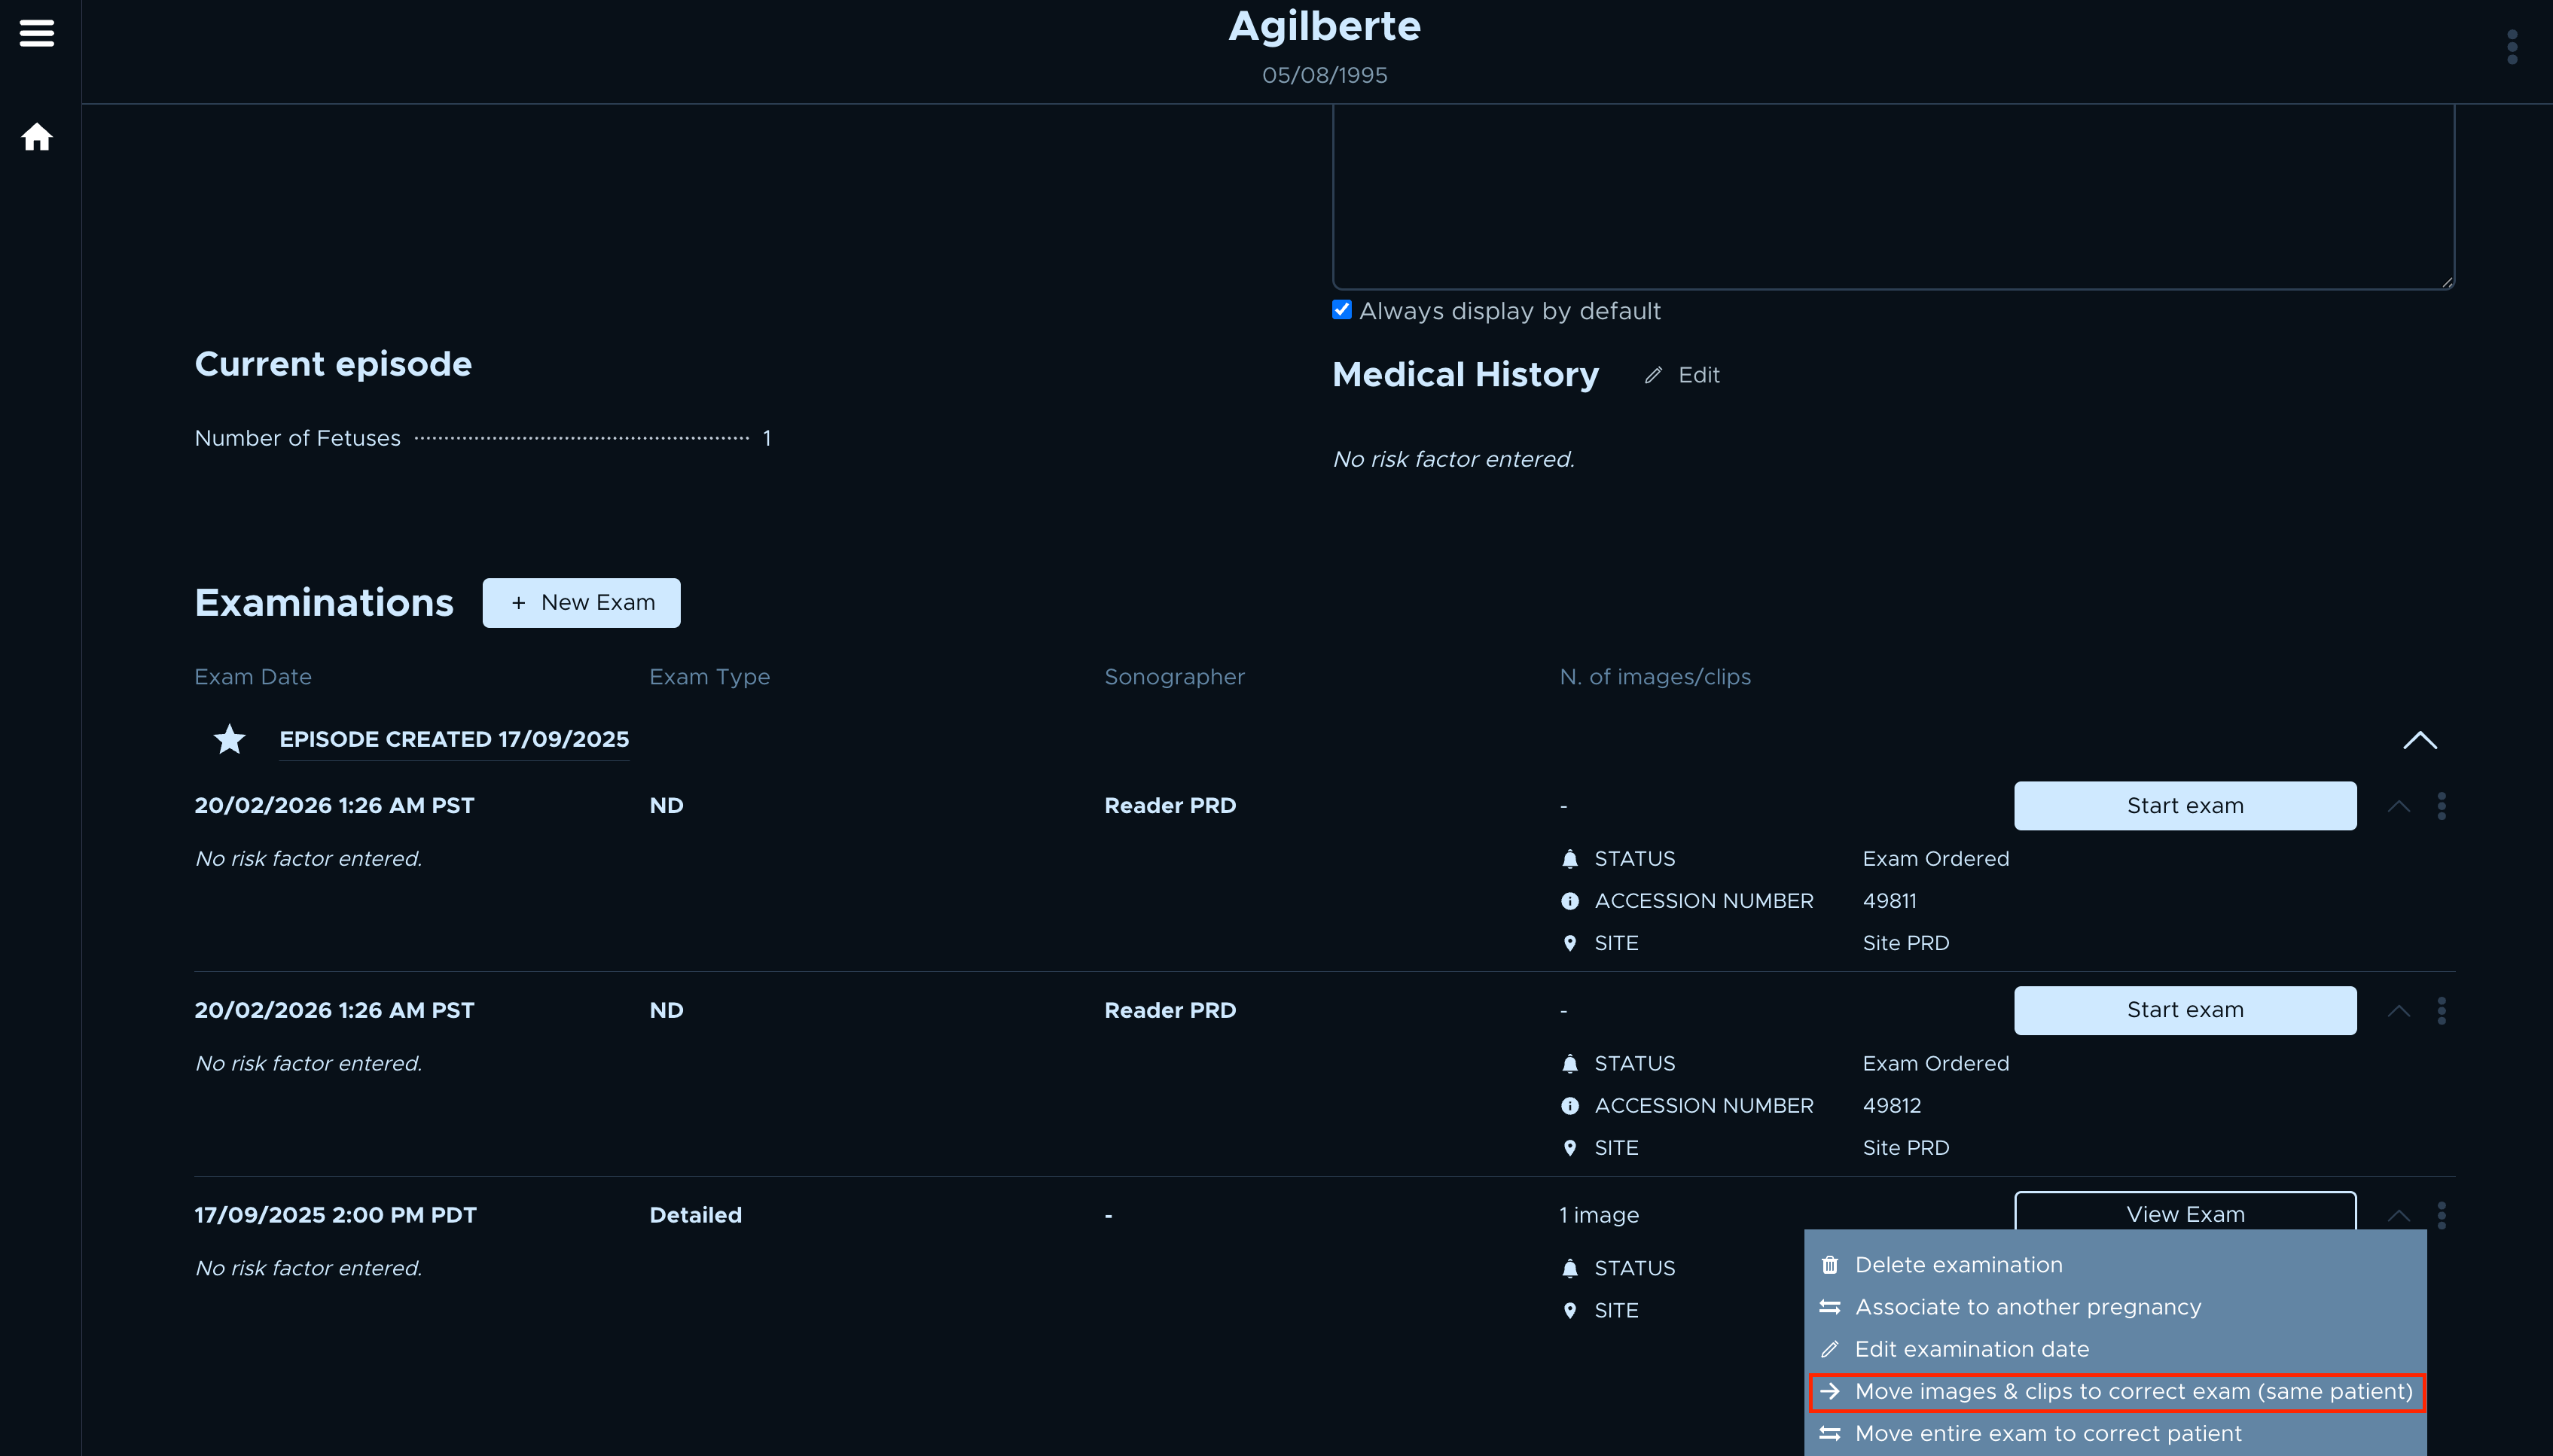
Step 1: Access the “Move images & clips to correct exam (same patient)” option
- Navigate to the patient record that currently has the exam
- Locate the exam that currently contains the DICOM you need to move
- Click the three-dot menu (⋮) next to the exam
- Select "Move images & clips to correct exam (same patient)"
Step 2: Confirm imaging is complete
A confirmation dialog will appear to ensure all DICOM have been captured before moving the images and clips.
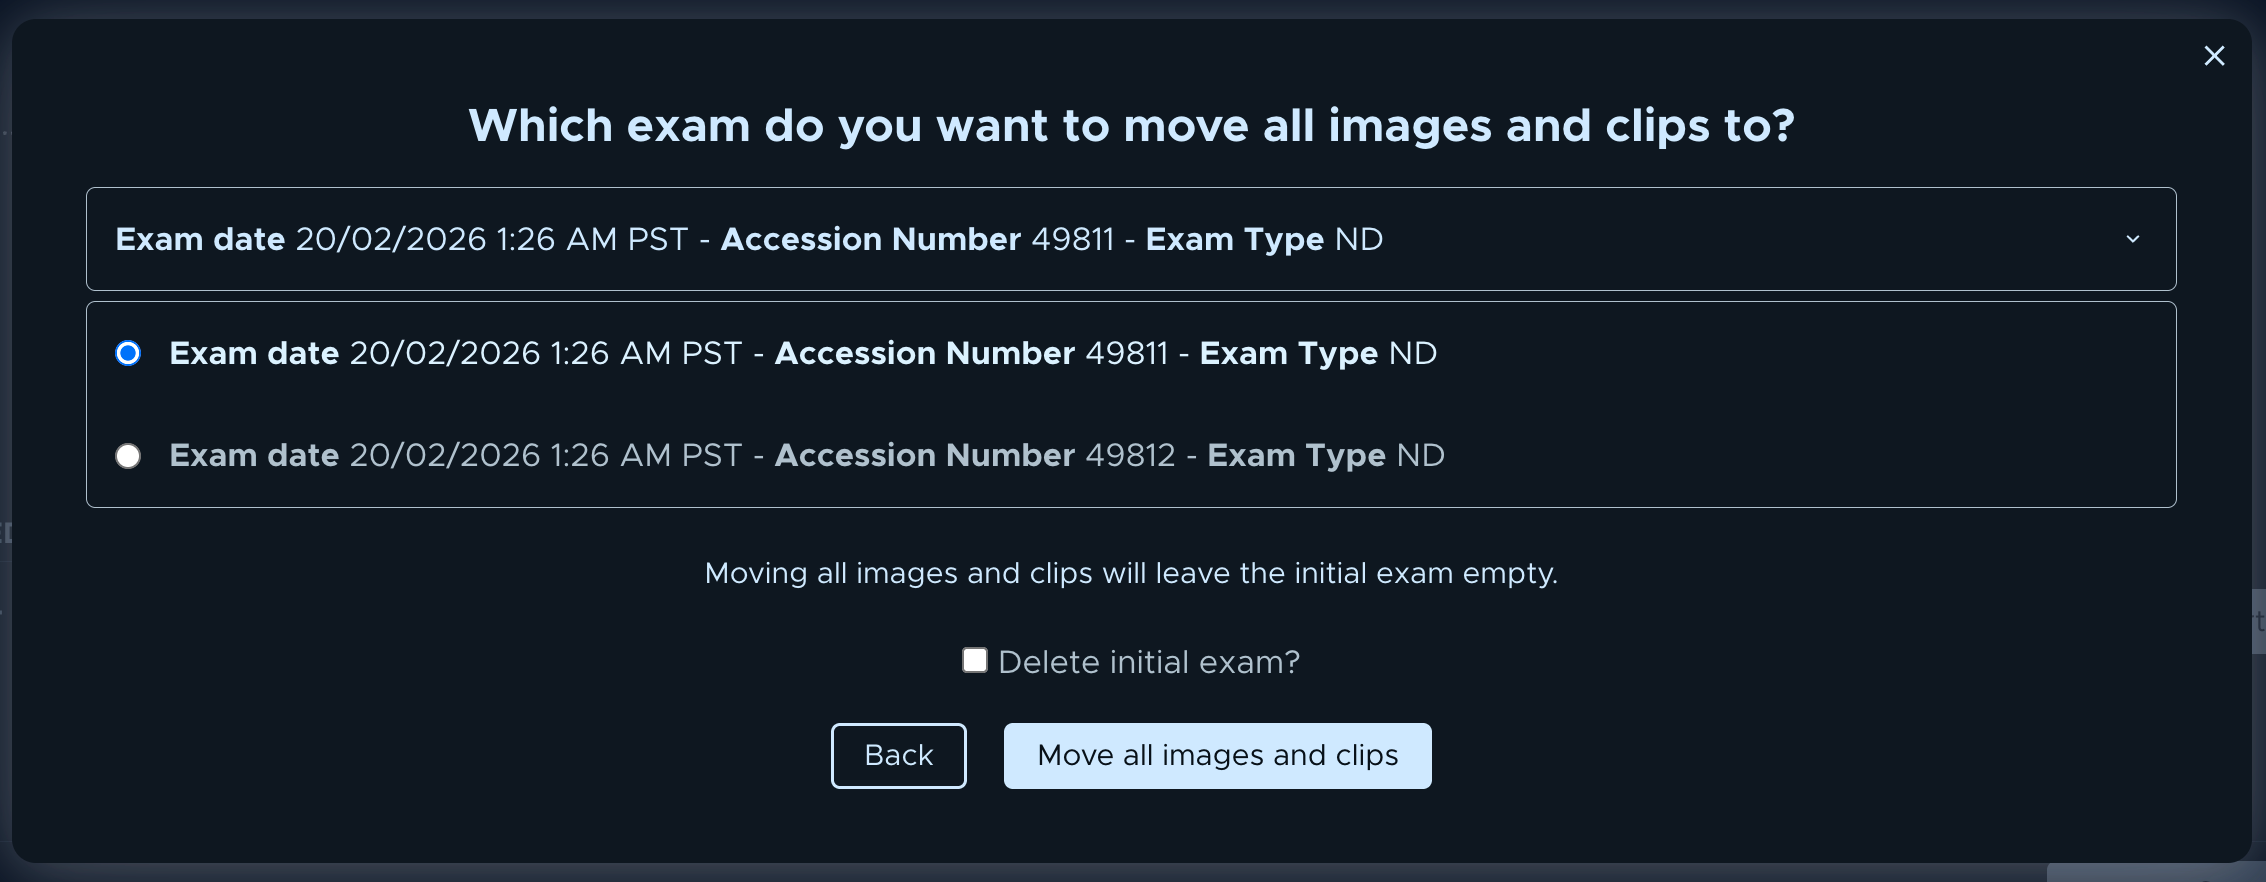
Step 3: Select the destination exam
In the destination selection screen, choose the exam (for the same patient) that you want to move DICOM to.
- The destination exam can already contain DICOM or be empty.
- You can choose whether to delete the initial exam or keep it.
Step 4: Completion
After successful completion:
✅ All images and clips will appear in the destination exam
✅ If the initial exam was kept, its status will be set back to "Exam ordered"
✅ The destination exam status will be set to "Imaging completed"
✅ You can choose to stay on the patient record or open the destination exam
🚫 When You Cannot Move images & clips to another exam (same patient)
No DICOM in the Source Exam
🖼️ If the source exam does not contain any images or clips, the action button will be disabled.
If the source exam does not contain any images or clips, the action button will be disabled.
Only One Exam Exists
1️⃣ If the patient has only one exam, there is no destination exam to move DICOM to. The button will be disabled.
Signed exams
✍️ You cannot move DICOM if the source exam or the destination exam is signed.
Unsign the report first, then try again.